services:
  web_server:
    image: ccsamsterdam/ngincat:4.0.16
    build: ./ngincat
    container_name: ngincat
    restart: unless-stopped
    networks:
      - amcat-net
    environment:
      - amcat4_client=${AMCAT_CLIENT:-http://amcat4client:3000}
      - amcat4_host=${AMCAT_HOST_INTERNAL:-http://amcat4:5000}
    ports:
      - 80:80 # [local port]:[container port]
    depends_on:
      - "web_client"
      - "api"
  web_client:
    image: ccsamsterdam/amcat4client:4.0.16
    build: ./amcat4client
    container_name: amcat4client
    restart: unless-stopped
    networks:
      - amcat-net
    environment:
      - AMCAT_SERVER=${AMCAT_HOST_EXTERNAL:-http://localhost/amcat}
    depends_on:
      - "api"
  api:
    image: ccsamsterdam/amcat4:4.0.16
    build: ./amcat4
    container_name: amcat4
    restart: unless-stopped
    networks:
      - amcat-net
    environment:
      # note that these take precedence over values set in `amcat4 config``
      - amcat4_elastic_host=${ELASTIC_HOST:-http://elastic8:9200}
      - amcat4_host=${AMCAT_HOST_EXTERNAL:-http://localhost/amcat}
      - FORWARDED_ALLOW_IPS=*
    depends_on:
      - "db"
  db:
    image: docker.elastic.co/elasticsearch/elasticsearch:8.18.4
    container_name: elastic8
    restart: unless-stopped
    # for security reasons, the database is only exposed to the other containers in the amcat-net network
    # If you want to be able to access it locally, uncomment the following two lines
    # ports:
    # - 9200:9200
    networks:
      - amcat-net
    environment:
      - discovery.type=single-node
      - bootstrap.memory_lock=true
      # limits memory usage of elasticsearch; 4g or less can cause errors when uploading larger document collections
      - "ES_JAVA_OPTS=-Xms4g -Xmx4g"
      - xpack.security.enabled=false
    # your database should have a folder on the host machine to permanently store data. By default
    # a docker volume (called elastic-volume) is used, which leaves management of the files to Docker
    # (see https://docs.docker.com/storage/volumes/). You can also store files somewhere else with
    # (for example):
    #
    # volumes:
    #   - /path/to/elastic-data:/usr/share/elasticsearch/data # [local path]:[container path]
    #
    # In this case, you need to make sure that the folder `/path/to/elastic-data` exists and Docker
    # has read and write access to it.
    volumes:
      - elastic-volume:/usr/share/elasticsearch/data:rw

networks:
  amcat-net:

volumes:
elastic-volume:2 Getting started
ImportantWill change soon
This is work in progress. Passages highlighted in red are likely to change soon.
In this chapter, we show you how to download, set up, and start AmCAT.

In the Installing and accessing AmCAT section, it is sufficient if you choose one of the sub-sections to follow. We explain how you can run AmCAT
- on our servers, which we recommend for testing purposes;
- through a Docker image, which we recommend for most people who want to conduct a research project and/or share data online;
- or install AmCAT directly on your system, which we only recommend for advanced users, who want a customised setup.
In the Frontend section, it makes sense to cover the amcat4client, which provides a react web interface to query data. Then you can select to either install the R or Python client.
2.1 Installing and accessing AmCAT
2.1.1 Run on our servers
ImportantComing soon…
2.1.2 AmCAT in your personal computer
Let’s first install AmCAT in your computer. For this, you need to: 1.Install Docker, 2.Copy the “docker-compose.yml” file in your computer, and 3.Run the file via terminal. It sounds hard, but do not worry, I will visually walk you through each step.
2.1.2.1 Install Docker
TipWhy do we use Docker for installation?
Functionally, Docker containers are a cross-platform installation format that makes it trivially easy to install software packages on Linux, MacOS and Windows without needing users to deal with dependency issues or installation quirks on different systems.1 A side effect is that we can easily develop AmCAT for all operating systems at once and you can be sure that we do not fall behind on developing AmCAT for your operating system of choice.
Docker is a software that allows easy creation and portability of software in something called containers. AmCAT is stored in one of such containers. To install it, you need to first install Docker: https://www.docker.com/get-started/. To install Docker, you can head over to the Docker website to get Docker Desktop or the Docker Engine and Docker Compose to use Docker from the command line.2 For a visual guide, you can check the video Johannes Gruber (2024) made: https://www.youtube.com/watch?v=iMyCdd5nP5U. Remember that to use Docker, you do NOT need to create an account.
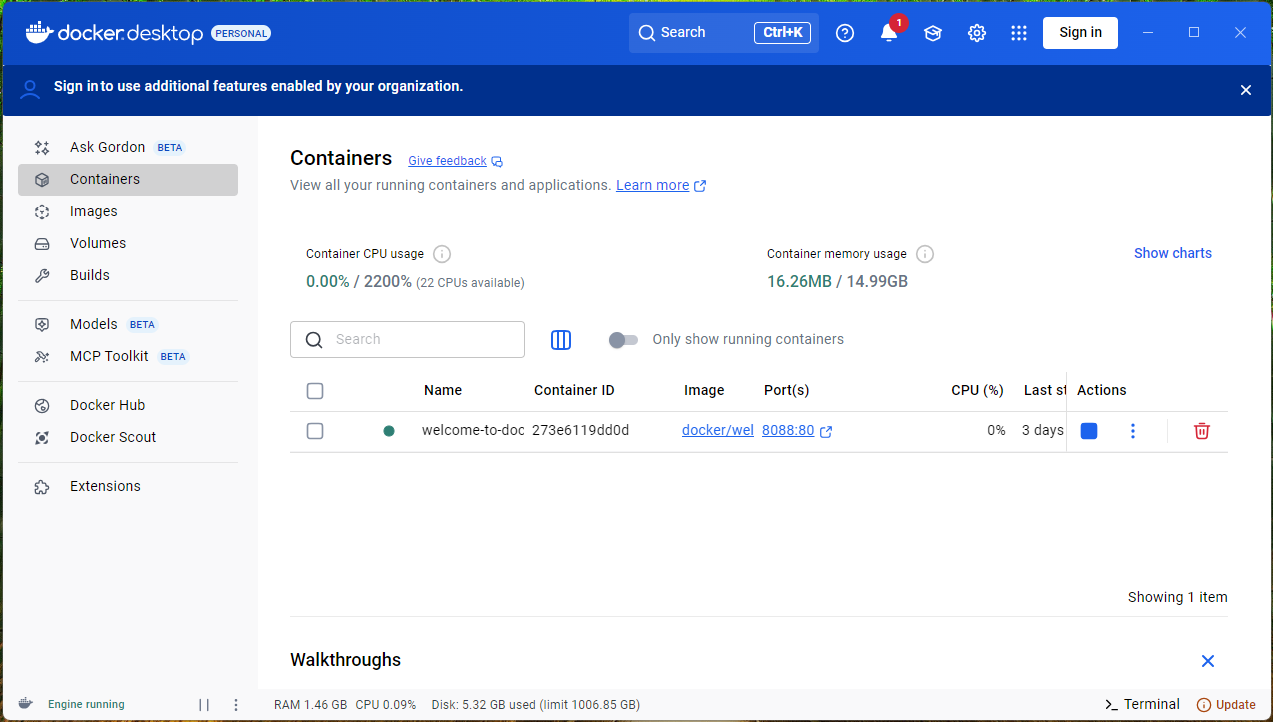
Docker Desktop makes installation easier if you do not use a package manager (which many Windows and MacOS users do not). Docker Desktop looks like this:
2.1.2.2 Copy the docker-compose.yml file in your computer
To install the AmCAT data layer, you should use our Docker Compose file. You can get it from here (save the file as “docker-compose.yml”).
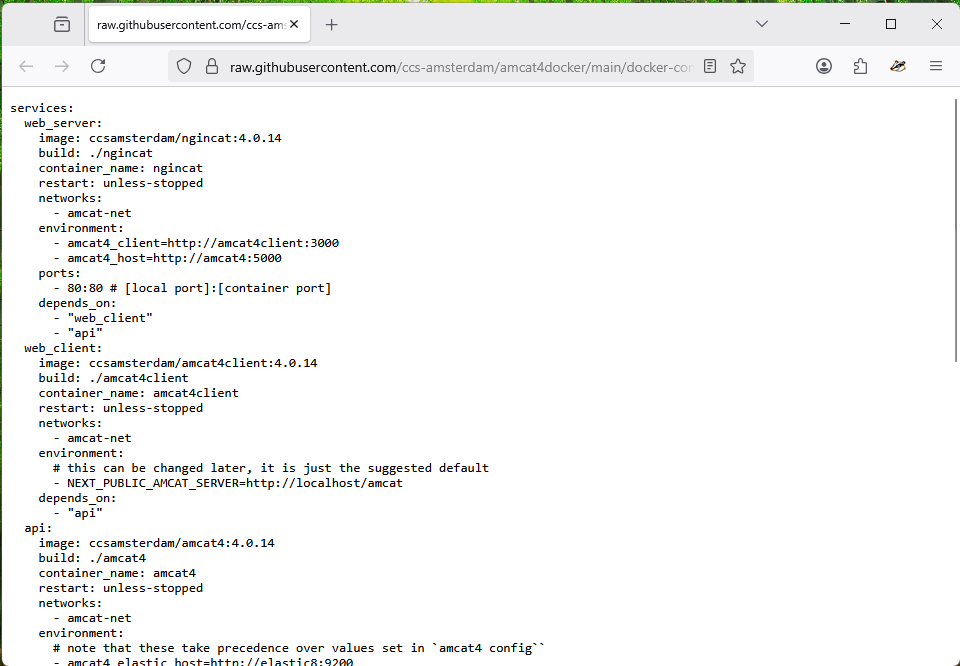
In general, Gruber (2024) explains how to copy a “docker-compose.yml” file depending on the Operating System (OS). Here, we visually follow the steps for the AmCAT “docker-compose.yml” using a Windows OS. Access the AmCAT “docker-compose.yml” here: https://raw.githubusercontent.com/ccs-amsterdam/amcat4docker/main/docker-compose.yml.
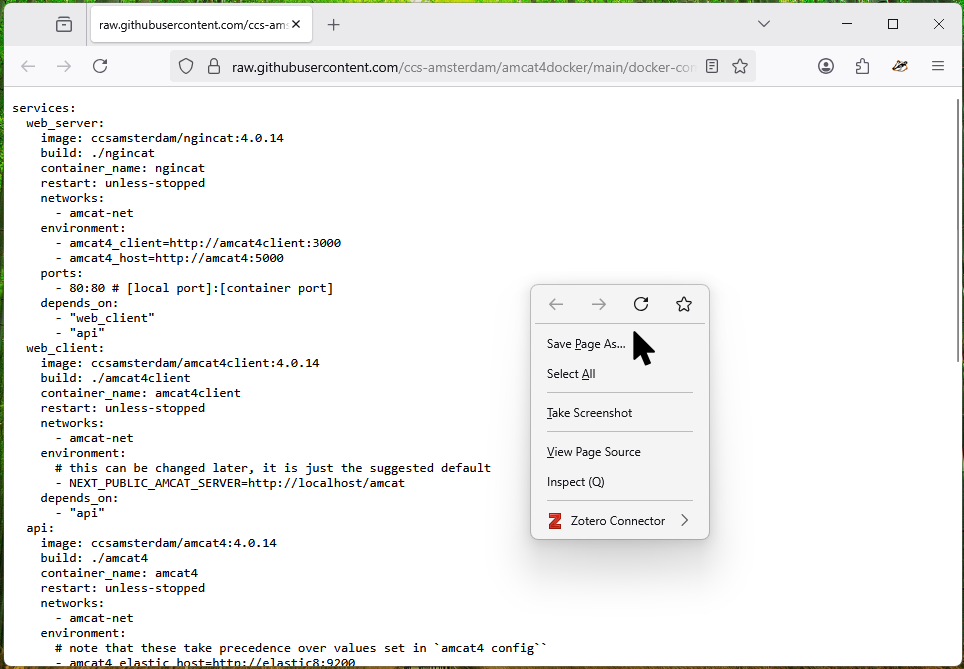
Now, press the right button of your mouse. That will display the following menu:
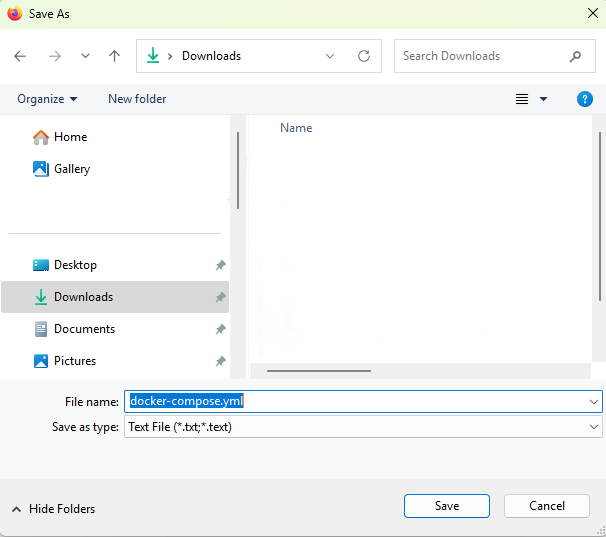
From there, press the option “Save Page As…” and save it in any location you want:
By default, Windows saves any “weird” file as “txt”:
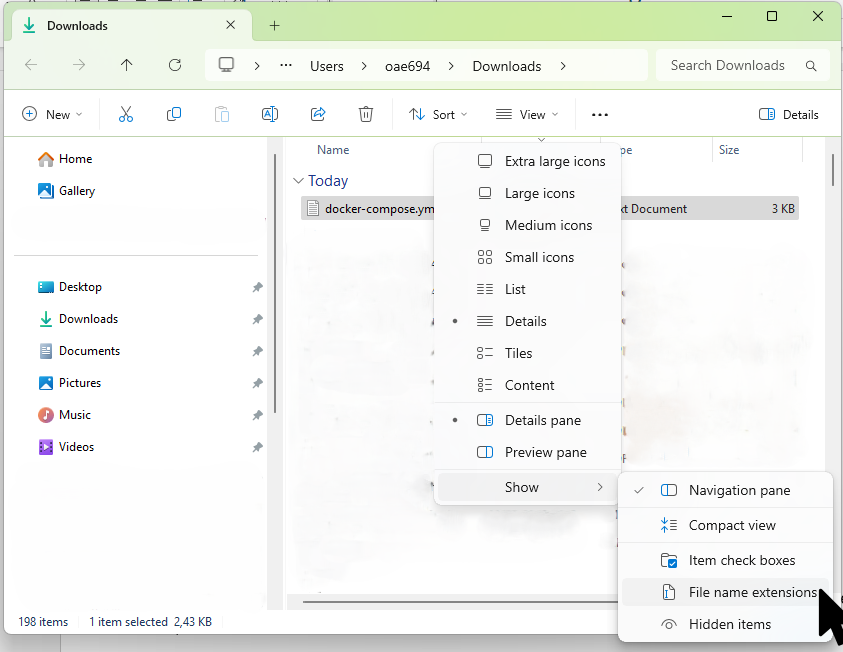
So, we need to explicitly tell Windows that our file is a “yml” type. To do so, you need to press View/Show/File name extensions:
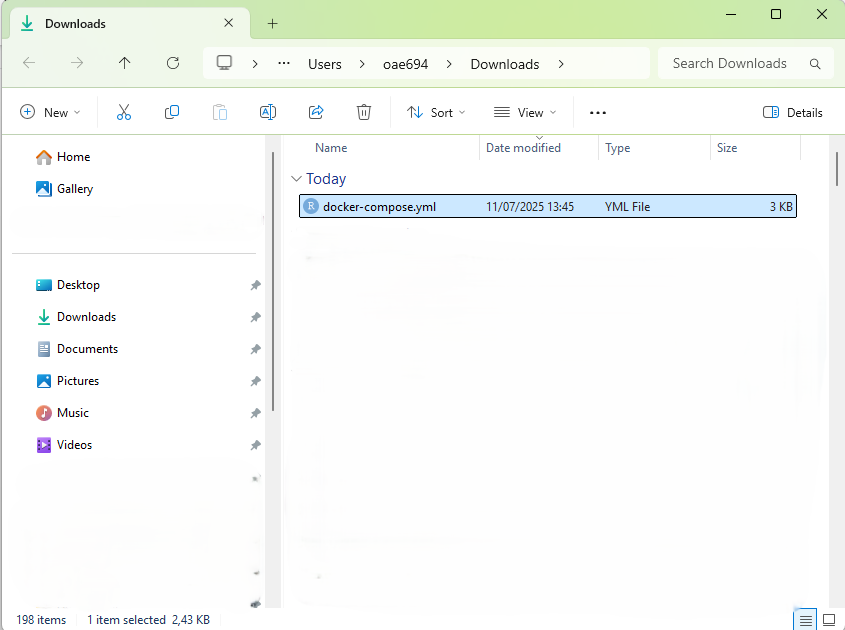
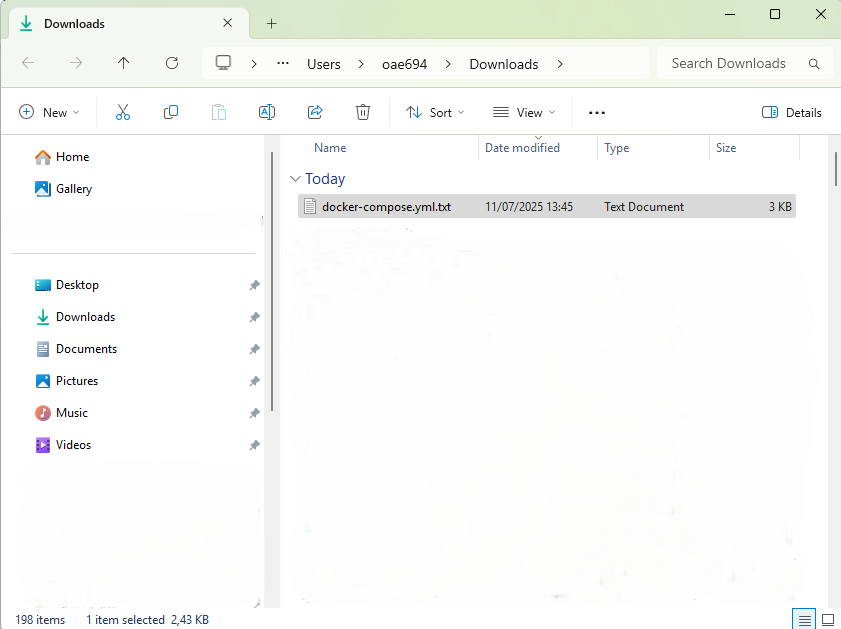
Now, you can see that Windows added the “txt” extension to the file:
All we need to do is to delete the extra “.txt”:
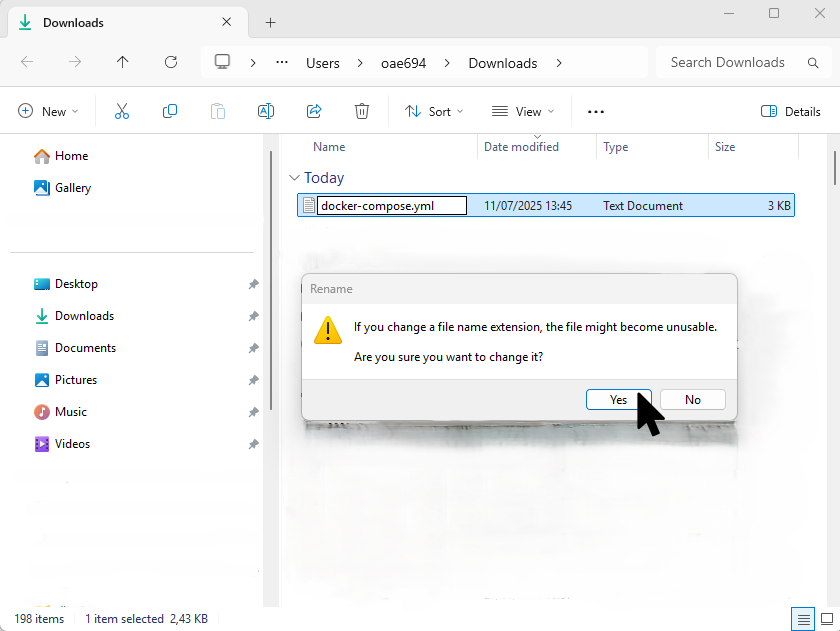
Now the file type changes to “YML file”.
2.1.2.3 Run the file via terminal
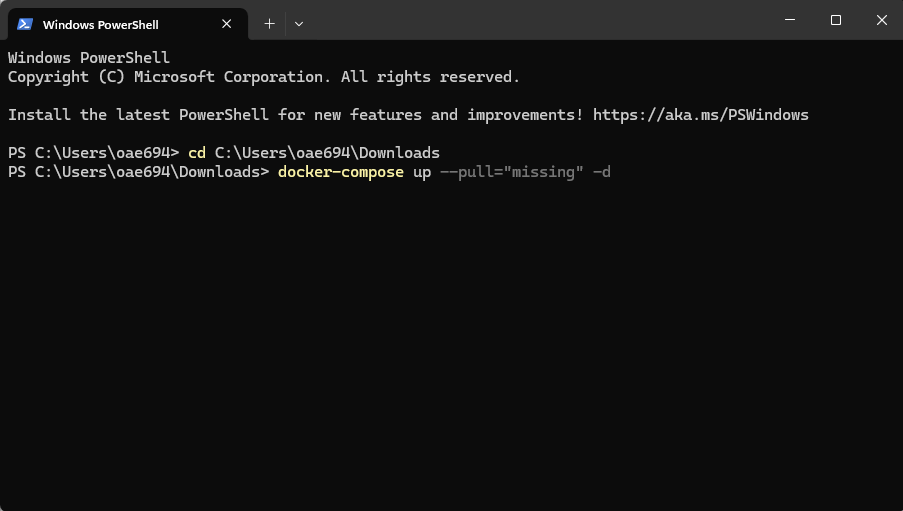
Now, we will run the file via terminal. Gruber (2024) https://www.youtube.com/watch?v=iMyCdd5nP5U shows how to do so depending on the OS. Here, we will do it for Windows. So, let’s open “Windows PowerShell”:
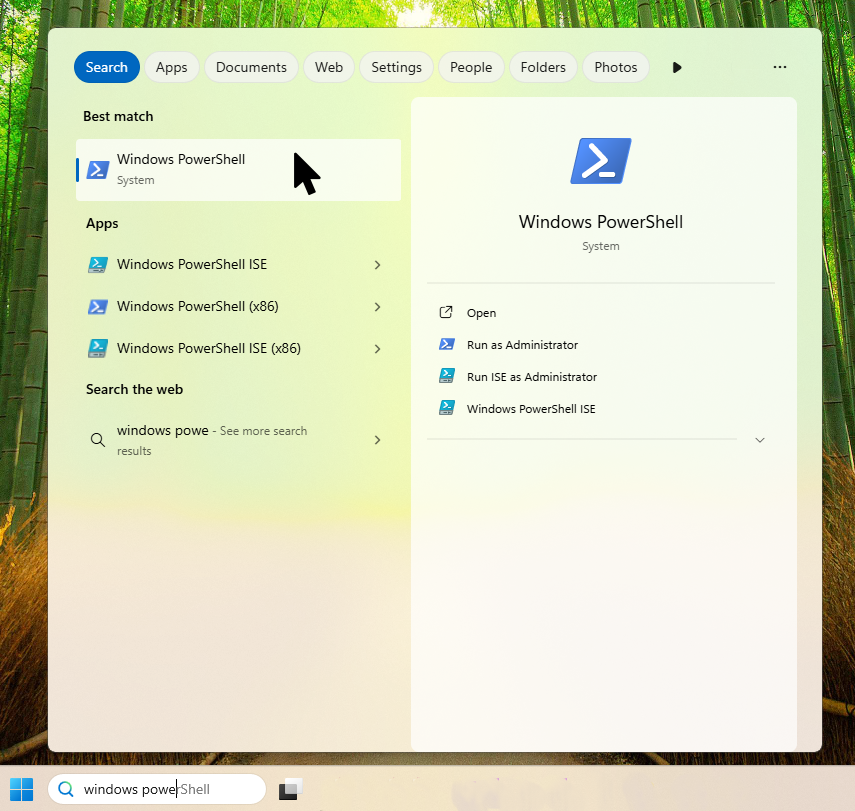
This will open the following window:
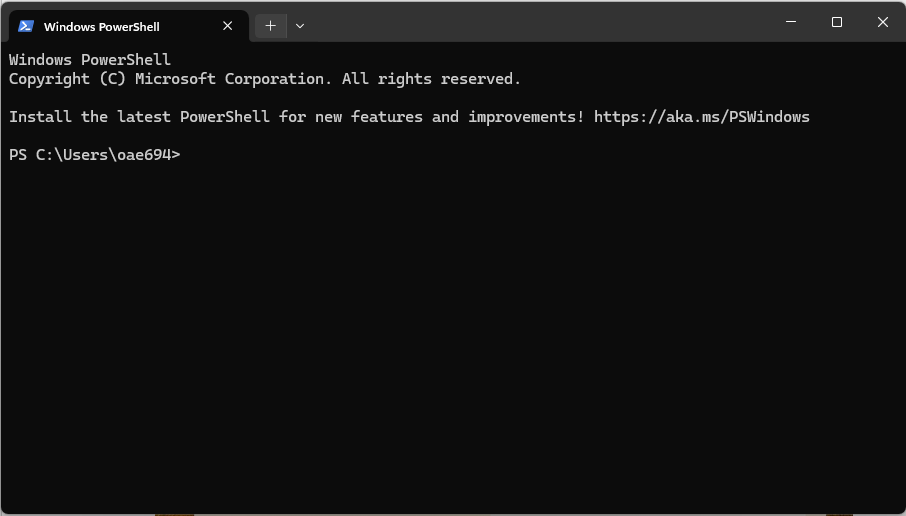
In here, we will: (a) move to the folder where the “docker-compose.yml” is, and (b) run the “docker-compose.yml” file.
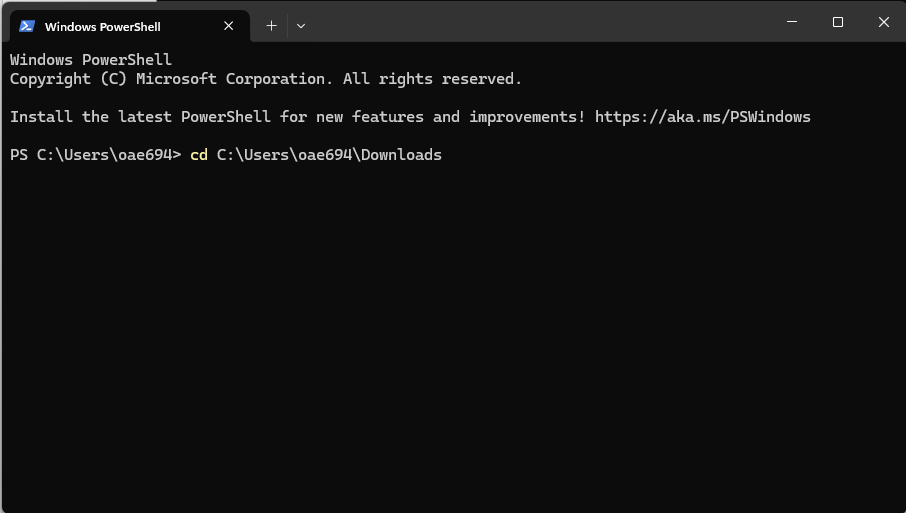
(a) Move to the folder where the “docker-compose.yml” is
For that, you will use the command cd followed by the path where the file is. For example, mine is in the “Download” folder, therefore, my command looks like:
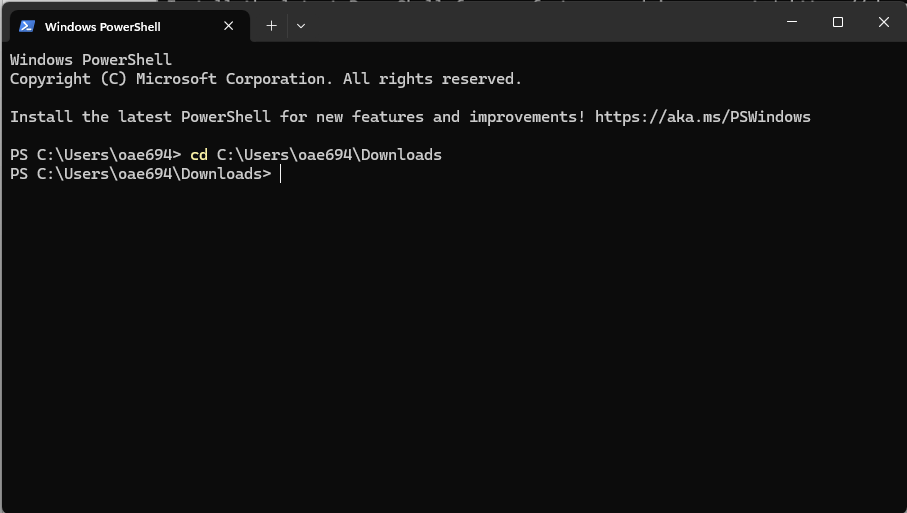
Now press enter. This will modify how the previous link looks like:
(b) Run the “docker-compose.yml” file
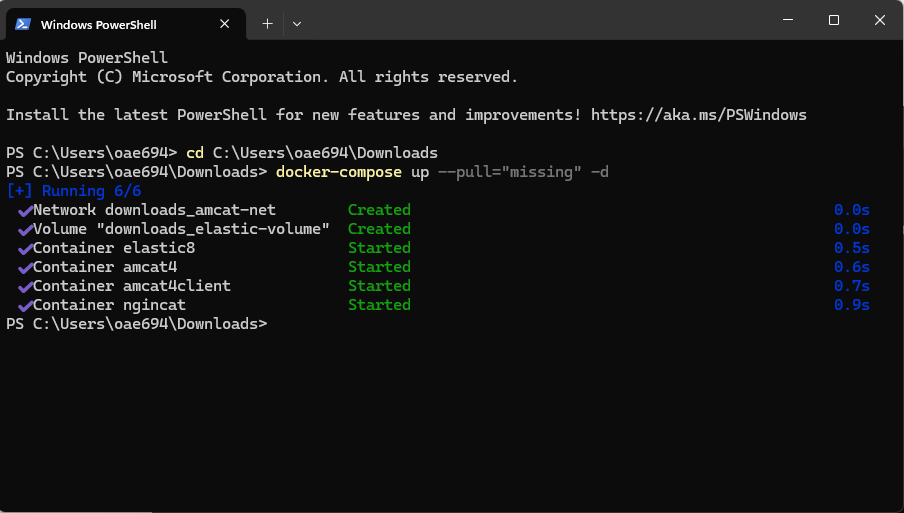
Now, you need to run the following command:
# docker-compose up --pull="missing" -d
Once it finishes running, it will show the following:
If you navigate to Docker Desktop, you will see that AmCAT, together with other dependencies, is now listed as a container under “downloads”:
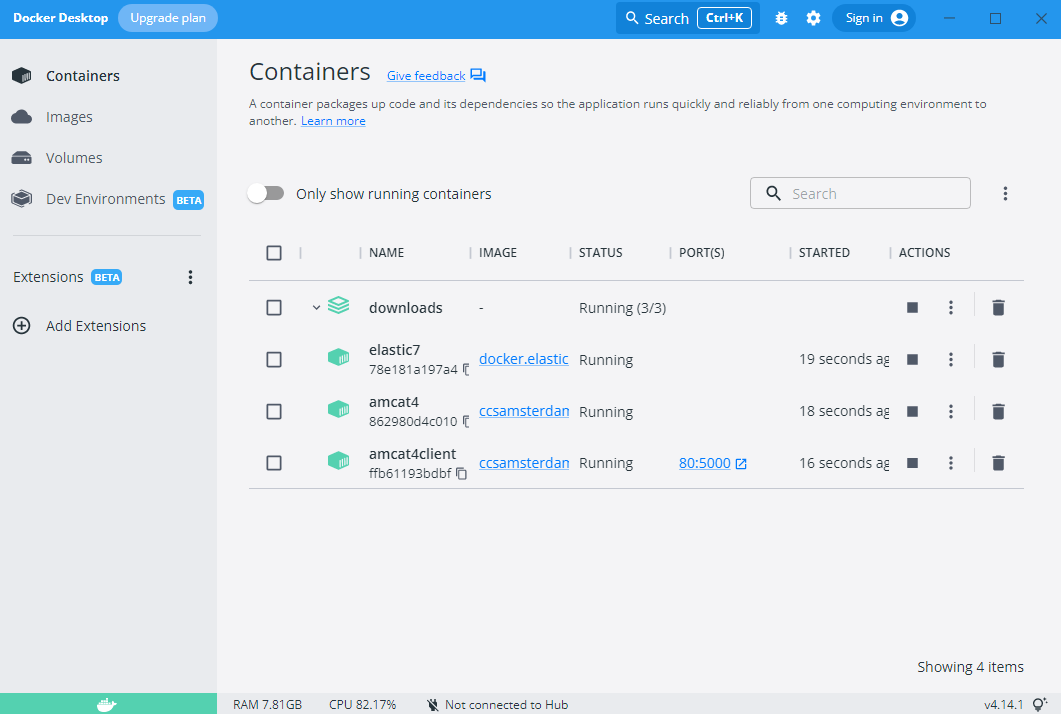
We tried to write the file to contain sensible defaults for testing it locally. If you plan to work with AmCAT for a research project and/or plan to update the images in the future, you should have a look at the customization option. Otherwise, you can continue.
NoteCustomization
The current default docker-compose.yml looks like this:
Setting the containers up from R or Python uses the same settings. You can leave most lines as they are, but we want to draw your attention to a couple of settings you might want to change:
- In lines 12, 13, we set the port to
80on the host machine. This means you will be able to access the AmCAT client without specifying a port (80 is the default port your browser uses to access an address). If the port is already in use, the container will crash. In this case, change80to a different port and access AmCAT through, for example,localhost:5000. - In lines 53, 54, 55, 56, we configured Elasticsearch to form a single-node cluster and use a maximum of 4GB memory.
- In lines 63, 64 we suggested a setting so Elasticsearch will store your data on a volume on the host machine. If you do not use this, your data will be destroyed when you remove the Elasticsearch container!. We recommend this to make it easier to back up your database and reuse it with a different installation of Elasticsearch (e.g., after an update) in the future. However, the container will not run if it does not have proper access to this folder. See the comment to solve this. Note that the suggested local path is just an example. Learn more about this in the chapter on backups and updates.
Besides the comand line, it is possible to download and start the AmCAT containers (Elasticsearch, amcat4, and amcat4client) from R and python:
Start a terminal and navigate to the directory where you downloaded the docker-compose.yml file3:
# docker-compose up --pull="missing" -dCheck if the containers are running with:
# docker ps
#> CONTAINER ID   IMAGE                                                  COMMAND                  CREATED              STATUS          PORTS                                   NAMES
#> 0628bc852c79   ccsamsterdam/amcat4client:0.0.1                        "nginx -g 'daemon of…"   About a minute ago   Up 58 seconds   0.0.0.0:80->5000/tcp, :::80->5000/tcp   amcat4client
#> 8134bcd1cbe8   ccsamsterdam/amcat4:0.0.1                              "./wait-for-it.sh el…"   About a minute ago   Up 59 seconds   5000/tcp                                amcat4
#> 2d59e128e748   docker.elastic.co/elasticsearch/elasticsearch:7.17.7   "/bin/tini -- /usr/l…"   About a minute ago   Up 59 seconds   9200/tcp, 9300/tcp                      elastic7
# install the required packages first:
# remotes::install_github("JBGruber/dockr")
# remotes::install_github("ccs-amsterdam/amcat4r")
# amcat4r::run_amcat_docker()This pulls downloads the default docker-compose.yml file from the same link as above. If you want to change the file first, just supply the path to the function afterwards:
# amcat4r::run_amcat_docker("docker-compose.yml")Check if the containers are running with:
# amcat4r::docker_lc()
#> # A tibble: 3 × 5
#>   name          image                                                status        id                                       ports
#>   <chr>         <chr>                                                <chr>         <chr>                                    <list>
#> 1 /amcat4client ccsamsterdam/amcat4client:0.0.1                      Up 58 seconds 0628bc852c79b88a9047034cc5a03867e1d00fc… <list>
#> 2 /amcat4       ccsamsterdam/amcat4:0.0.1                            Up 59 seconds 8134bcd1cbe82bb6c0cb8beb10df1e3a03ddc8f… <list>
#> 3 /elastic7     docker.elastic.co/elasticsearch/elasticsearch:7.17.7 Up 58 seconds 2d59e128e748fa6ac4f5023945b5b7ab28f7ac2… <list>
# coming soonIt might take a couple of seconds for Elasticsearch to start up.
2.2 Access AmCAT
Great! So far, we told you that you have installed AmCAT, but you cannot see it yet… AmCAT can be accessed via its Graphic User Interface (GUI) and via its Application Programming Interface (API).
Important
For AmCAT to work in Windows and MAC, Docker has to be running, i.e. open Docker Desktop.
2.2.1 Accessing the GUI
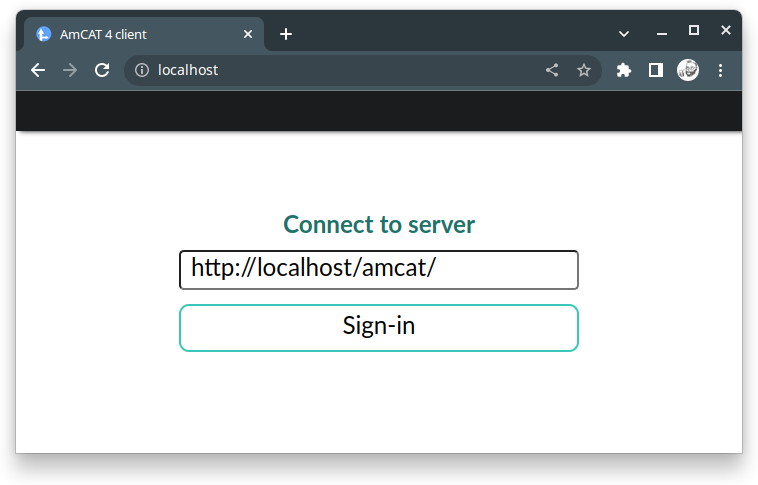
Open your favorite browser (e.g. Chrome, Firefox, or Edge) and type: http://localhost/.
This will open a page that looks like:

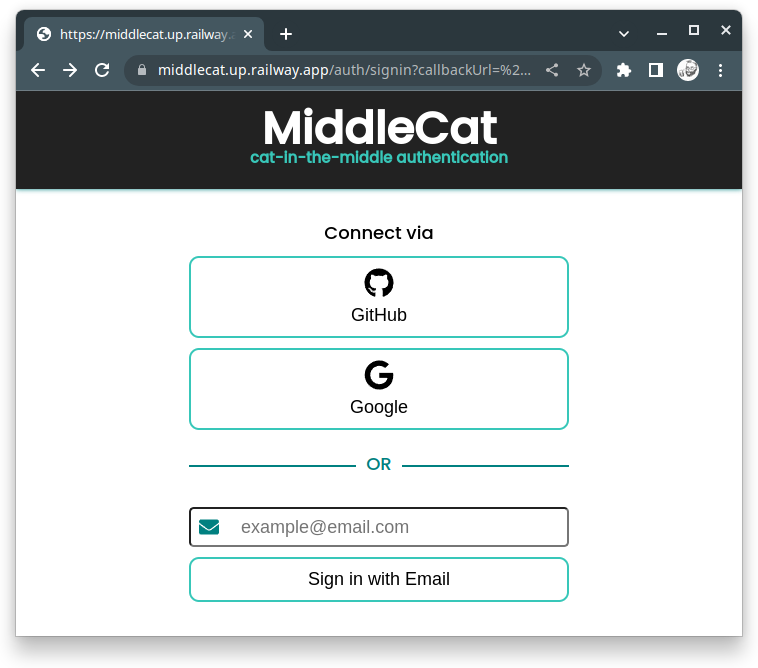
From there, you should press “Log in” to finish setting up your account, which will open a window that looks like:
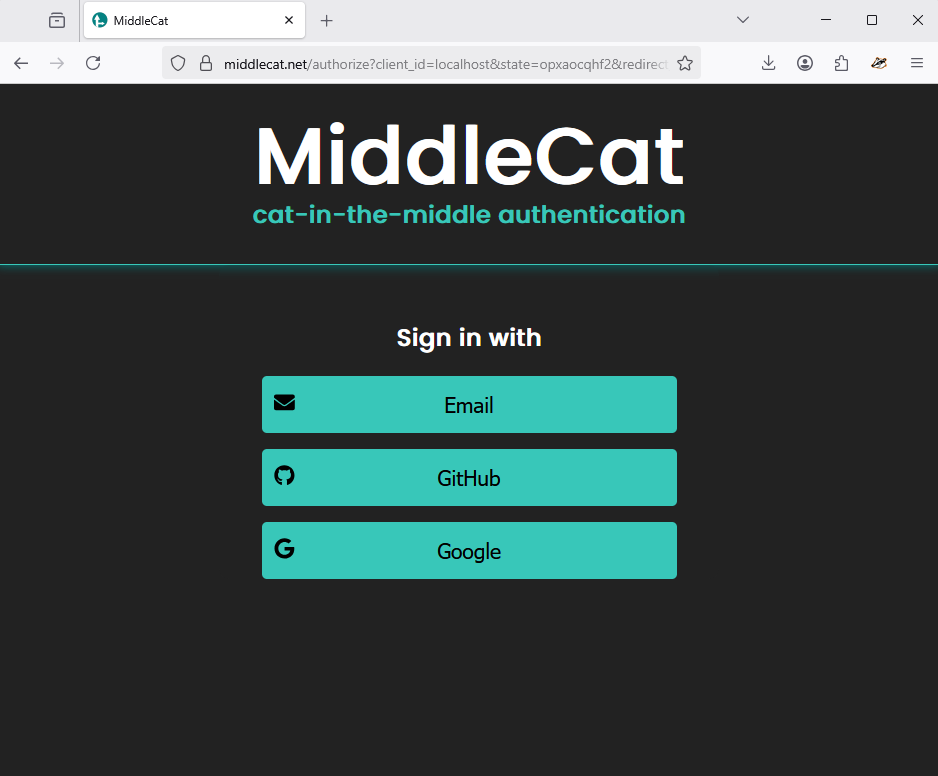
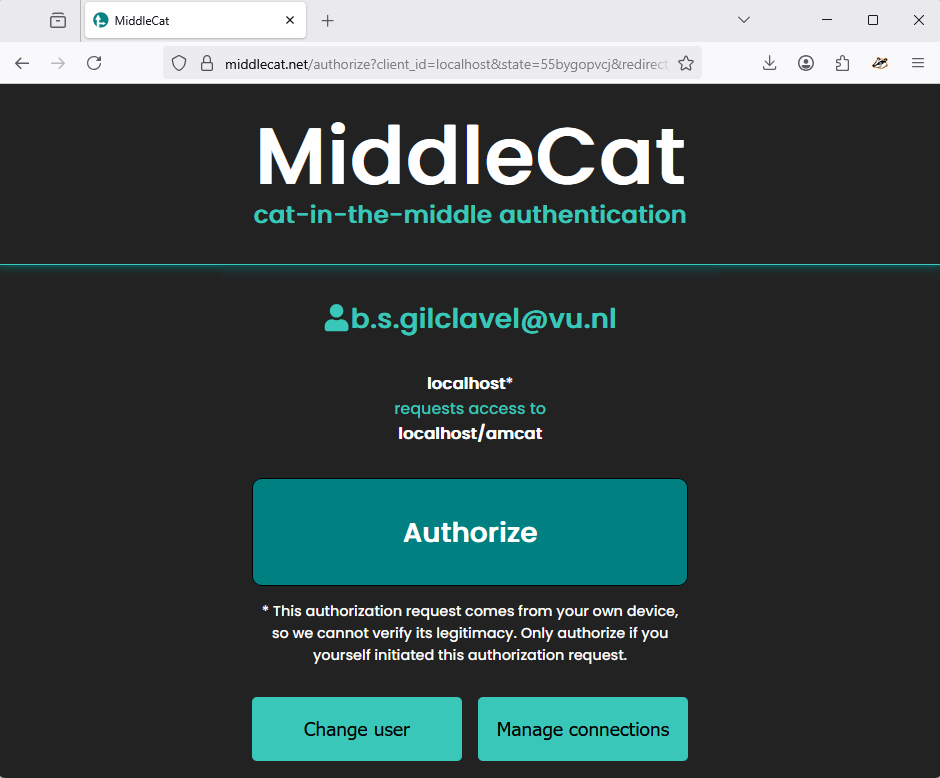
Now, you can safely log in using your email. This will create a link that will be sent to the email you provided. Just click on it. This will display a window that looks like the one beneath, just press Authorize:
Now, you can just enter the server or check the authentication options:

2.2.1.1 Authentication options
If you are thinking on giving access to others, then you should first check the settings and change to your needs. You can do this with amcat4 config:
# docker exec -it amcat4 amcat4 config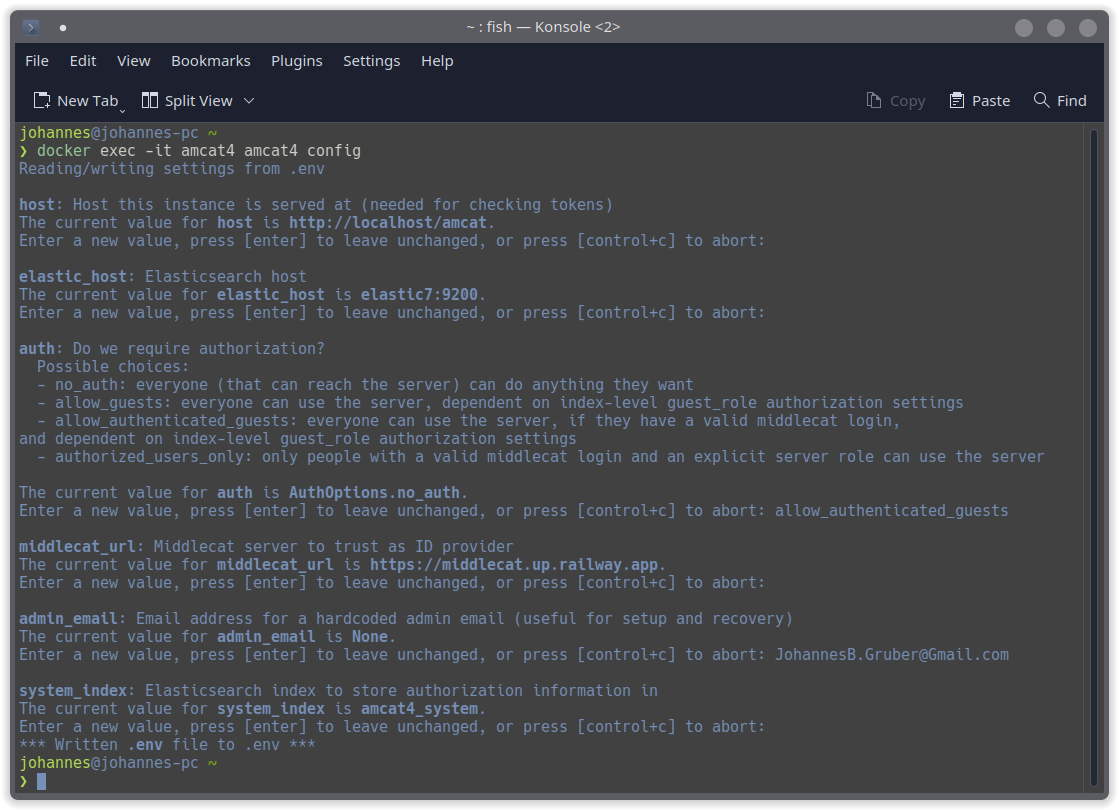
If you choose anything but no_auth for authentification options, you should also add a global admin user via:
# docker exec -t amcat4 amcat4 add-admin admin@example.com# coming soon# coming soonYou can now use Middlecat to authenticate as the admin user:
2.3 Setup on your own server
If you decide not to go with Docker, for example, because you feel you need more control over what is happening, you can also run AmCAT on your system directly. We do not recommend this anymore and have, in fact, switched our own servers over to use the Docker images. If there is something wrong with the images or you simply want to customise the setup, we suggest you head over to the GitHub repo and change the files as you like.
If you still want to go without Docker, feel free to use the example configuration below. We assume that if you are going this route, you are running a Linux server. Below we show one example setup. Obviously feel free to replace the suggested Linux tools like systemd or nginx with your own choice.
2.3.0.1 amcat4 – aka AmCAT server
The first piece to set up is the AmCAT server and the Elasticsearch database it interacts with. To download and install Elasticsearch, refer to their website, or, preferably, install it through a package manager. For example, if you are running Debian or Ubuntu or another distro which uses apt you can install Elasticsearch 7.x (which we are currently working with) like this:
# curl -fsSL https://artifacts.elastic.co/GPG-KEY-elasticsearch | sudo gpg --dearmor -o /usr/share/keyrings/elastic.gpg
# echo "deb [signed-by=/usr/share/keyrings/elastic.gpg] https://artifacts.elastic.co/packages/7.x/apt stable main" | sudo tee -a /etc/apt/sources.list.d/elastic-7.x.list
# sudo apt update
# sudo apt install elasticsearch
In the next step, you need to configure Elasticsearch:
# sudo nano /etc/elasticsearch/elasticsearch.ymlConfigure the database to your own liking in terms of user management and exposure. Since we are controlling it through amcat4, the only two things that really matter is the address and port (and that amcat4 still has access after you’re done configuring Elasticsearch). So within elasticsearch.yml, we only look for two lines:
# network.host: localhost
#...
# http.port: 9200
You can configure the memory usage of Elasticsearch
# echo "-Xms4g" | sudo tee -a /etc/elasticsearch/jvm.options.d/memory.optionsLeaving the values at their defaults here, we can enable the systemd service (skip this step if you’ve installed Elasticsearch through Docker):
# sudo systemctl daemon-reload
# sudo systemctl enable elasticsearch
# sudo systemctl start elasticsearch
You can check if everything is working with:
# curl -X GET 'http://localhost:9200'
#> {
#>   "name" : "amcat-opted-trekdrop0",
#>   "cluster_name" : "amcat-opted",
#>   "cluster_uuid" : "Sx-D89zmSx2zAcwl62u32A",
#>   "version" : {
#>     "number" : "7.17.6",
#>     "build_flavor" : "default",
#>     "build_type" : "deb",
#>     "build_hash" : "f65e9d338dc1d07b642e14a27f338990148ee5b6",
#>     "build_date" : "2022-08-23T11:08:48.893373482Z",
#>     "build_snapshot" : false,
#>     "lucene_version" : "8.11.1",
#>     "minimum_wire_compatibility_version" : "6.8.0",
#>     "minimum_index_compatibility_version" : "6.0.0-beta1"
#>   },
#>   "tagline" : "You Know, for Search"
#> }
Next, you want to setup the AmCAT server. You can do this wherever you like, but we will set things up at /srv/amcat:
sudo git clone https://github.com/ccs-amsterdam/amcat4 /srv/amcat
sudo chown -R $USER:$USER /srv/amcat
cd /srv/amcat
python3 -m venv env
env/bin/pip install -e .[dev]
To test if it runs as expected, you can use:
env/bin/python -m amcat4 run
#> /srv/amcat/env/lib/python3.9/site-packages/elasticsearch/connection/base.py:200: ElasticsearchWarning: Elasticsearch #> built-in security features are not enabled. Without authentication, your cluster could be accessible to anyone. See #> https://www.elastic.co/guide/en/elasticsearch/reference/7.17/security-minimal-setup.html to enable security.
#>   warnings.warn(message, category=ElasticsearchWarning)
#> [INFO   :root           ] Starting server at port 5000, debug=True
#> INFO:     Started server process [1001112]
#> [INFO   :uvicorn.error  ] Started server process [1001112]
#> INFO:     Waiting for application startup.
#> [INFO   :uvicorn.error  ] Waiting for application startup.
#> INFO:     Application startup complete.
#> [INFO   :uvicorn.error  ] Application startup complete.
#> INFO:     Uvicorn running on http://0.0.0.0:5000 (Press CTRL+C to quit)
#> [INFO   :uvicorn.error  ] Uvicorn running on http://0.0.0.0:5000 (Press CTRL+C to quit)
To check and adapt the settings of AmCAT use:
env/bin/python -m amcat4 configSince you probably don’t want to run AmCAT in an open ssh tab all the time, you should set it up as a service, for example, with systemd. So head over to /etc/systemd/system and create a new file, for example, amcat.service.
Here is a small example to set things up:
[Unit]
Description=Amcat4 API
After=network.target
Requires=elasticsearch.service

[Service]
Type=simple
User=amcat
Group=amcat
WorkingDirectory=/srv/amcat/amcat4

Environment=AMCAT4_ELASTIC_HOST=http://localhost:9200
Environment=AMCAT4_DB_NAME=/srv/amcat/amcat4.db

ExecStart=/srv/amcat/env/bin/uvicorn \
        --proxy-headers \
        --forwarded-allow-ips='*' \
        --workers=2 \
        --no-access-log \
        --uds /tmp/amcat.socket \
        --root-path /api \
        amcat4.api:app

ExecReload=/bin/kill -HUP ${MAINPID}
RestartSec=1
Restart=always

[Install]
WantedBy=multi-user.target
In the above service, we run the AmCAT server as the user amcat. To create this user and hand over the ownership of the AmCAT server folder to it use:
sudo useradd amcat
sudo chown -R amcat:amcat /srv/amcat
Then you can start the service and enable it to run on startup:
sudo systemctl daemon-reload
sudo systemctl start amcat.service
sudo systemctl enable amcat.service
Now you can check if everything is working with
systemctl status amcat.service
● amcat.service - Amcat4 API
#>      Loaded: loaded (/etc/systemd/system/amcat.service; enabled; vendor preset: enabled)
#>      Active: active (running) since Thu 2022-11-03 10:39:23 CET; 3min 29s ago
#>    Main PID: 197173 (uvicorn)
#>       Tasks: 4 (limit: 33532)
#>      Memory: 86.8M
#>         CPU: 1.770s
#>      CGroup: /system.slice/amcat.service
#>              ├─197173 /srv/amcat/env/bin/python3 /srv/amcat/env/bin/uvicorn --proxy-headers --forwarded-allow-ips=* --workers=2 --no-access-log --uds /tmp/amcat.socket --root-path /api amcat4.api:app
#>              ├─197174 /srv/amcat/env/bin/python3 -c from multiprocessing.resource_tracker import main;main(4)
#>              ├─197175 /srv/amcat/env/bin/python3 -c from multiprocessing.spawn import spawn_main; spawn_main(tracker_fd=5, pipe_handle=7) --multiprocessing-fork
#>              └─197176 /srv/amcat/env/bin/python3 -c from multiprocessing.spawn import spawn_main; spawn_main(tracker_fd=5, pipe_handle=9) --multiprocessing-fork
If something went wrong, you can troubleshoot with sudo journalctl -eu amcat.service.
2.4 Frontend
2.4.1 amcat4client
Note
If you have checked port 5000 of your new AmCAT server while testing it above (i.e., http://0.0.0.0:5000), you were probably disappointed by a simple {"detail":"Not Found"} message. This is because the client has been split from the main package to make it easier to develop. You can install the React client next to AmCAT in/srv/amcat4client using:
cd /srv/
sudo git clone https://github.com/ccs-amsterdam/amcat4client.git
sudo chown -R $USER: amcat4client
cd amcat4client
npm install
If you get error messages about outdated versions of dependencies (which is likely on Ubuntu and Debian) you should update Node.js. On Debian, you can do this likes so:
su
curl -fsSL https://deb.nodesource.com/setup_19.x | bash - &&\
apt-get install -y nodejs
exit
And the equivalent on Ubuntu:
curl -fsSL https://deb.nodesource.com/setup_19.x | sudo -E bash - &&\
sudo apt-get install -y nodejs
See this repository for instructions for other Linux flavours.
After that, you can build the React app:
npm run buildIf your AmCAT instance will be publicly reachable, you can build the React app permanently attached to only your instance of AmCAT:
REACT_APP_FIXED_HOST=https://example.com/api npm run buildOnce this has finished, you should hand over ownership of the React application to the previously created AmCAT user
sudo chown -R amcat:amcat .Now we have an Elasticsearch and amcat4 running. But they are currently not accesible. To solve this, we can use, for example, nginx to provide users access to the React frontend and the AmCAT API. Create a new nginx config file with, for example, nano:
sudo nano /etc/nginx/sites-available/amcat.confBelow is a minimal example of the amcat.conf file, which you can copy and paste: For more information, visit the uvicorn documentation website.
server {
    client_max_body_size 4G;

    listen 5000;

    location /api/ {
      rewrite  ^/api/(.*) /$1 break;
      proxy_set_header Host $http_host;
      proxy_set_header X-Forwarded-For $proxy_add_x_forwarded_for;
      proxy_set_header X-Forwarded-Proto $scheme;
      proxy_set_header Upgrade $http_upgrade;
      proxy_set_header Connection $connection_upgrade;
      proxy_redirect off;
      proxy_buffering off;
      proxy_pass http://amcat;
    }

    location / {
      root /srv/amcat4client/build;
      index index.html;
      try_files $uri $uri/ /index.html;
    }

}

map $http_upgrade $connection_upgrade {
    default upgrade;
    '' close;
}

upstream amcat {
    server unix:/tmp/amcat.socket;
}
Warningwarning about http
This setup assumes that your AmCAT sever will only be available in the local network. If it should be accesible via the internet, we strongly recommend to enable https. You can find more information about that on the nginx website or this guide.
To enable the site, use:
sudo ln -s /etc/nginx/sites-available/amcat.conf /etc/nginx/sites-enabled/amcat.conf Then simply restart nginx, for example, through systemd:
sudo systemctl restart nginx.serviceTo test if the API is reachable, use this:
curl http://localhost:5000/api/
#> {"detail":"Not Found"}
If everything works, you can now access the client at http://localhost:5000, or the address of your server, if you installed AmCAT remotely:
The React app is always running locally in your browser, even if you’ve accessed it on another computer. So the appropriate host needs to be the route to the AmCAT server. In the example above, I set up an AmCAT instance in my local network on a computer with the IP address 192.168.2.180 and port 5000. To access that host, you need to enter:
Note
Host: “http://192.168.2.180:5000/api”
Email: “admin”
Password: “admin”
Just replace 192.168.2.180 with the address of the machine you set up AmCAT on.
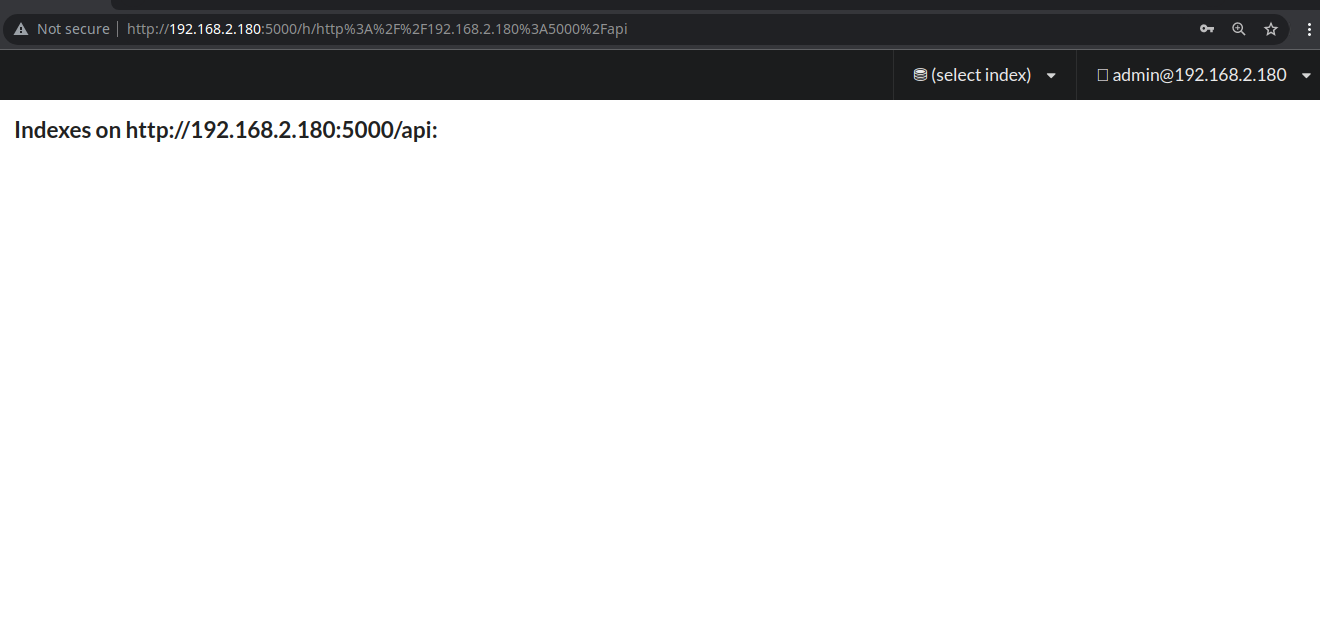
Success! However, the interface doesn’t show much at this point, since we added no data yet. We will do that in the storage chapter.
2.4.2 API Client
The R client is called amcat4r and can be installed via the following command in R (install remotes first if you don’t have it yet):
remotes::install_github("ccs-amsterdam/amcat4r")If you have set up the AmCAT suite as shown above, you should be able to log into the database:
library(amcat4r)
login("http://localhost/api",  username = "admin", password = "supergeheim")
If this does not throw an error, you have set everything up correctly.
Install amcat4py from the command line through pip:
pip install amcat4pyThe you can open Python and log in:
from amcat4py import AmcatClient

amcat = AmcatClient("http://localhost/amcat")
If this does not throw an error, you have set everything up correctly.
Technically, it is a little more complicated, as Docker containers have many similarities to virtual machines. However, for most users that technical background is not really important. If you want to learn more, have a look here.↩︎
On Ubuntu and Debian, the Docker Compose version in the repos is too old. You can use this gist to update it: https://gist.github.com/JBGruber/db4de49ee106889b969a277f800c05b8↩︎
The yaml file is written for Docker Compose V2. If you are having trouble, check your version with
docker-compose --version. Get the newest version as described here.↩︎